Textured Glass Photoshop Instructions
We ask that you work with Lab Center Designers and Content Producers, well-versed in Photoshop, to help you create and employ the textured glass effect.
-
Define the composition
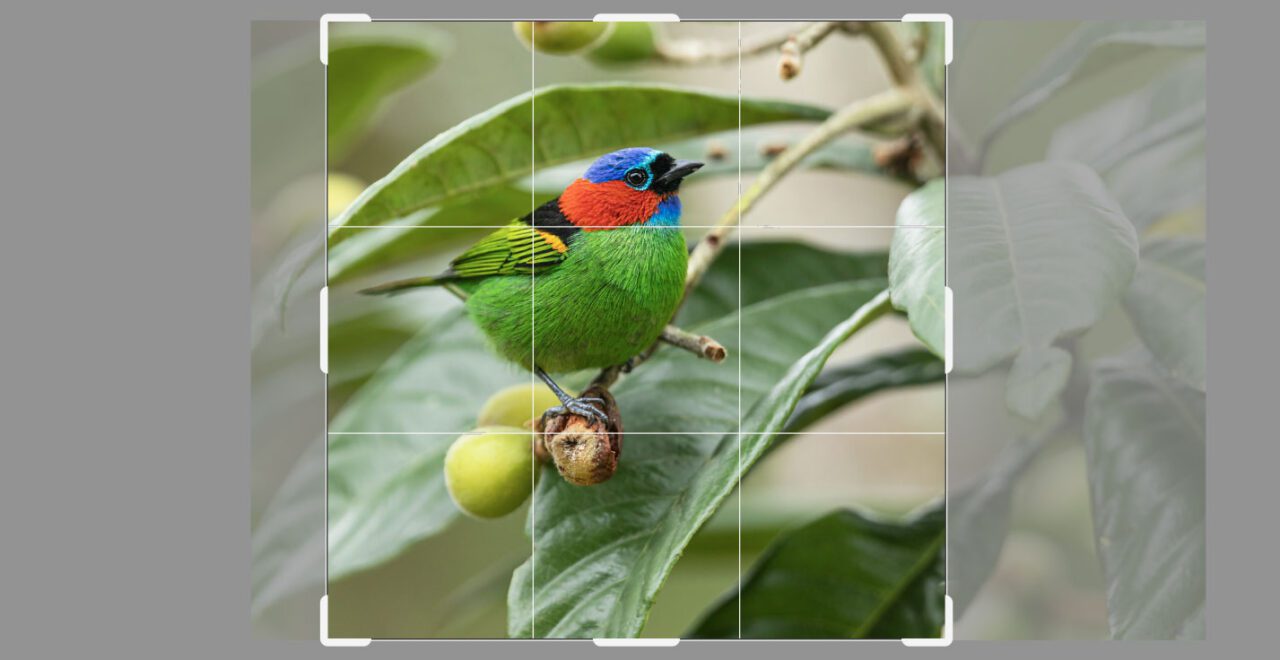
Select an image and think about which section will be blurred. The blur should take up the full width or height of the image while ensuring a good portion of the animal is in focus. Open the image in Photoshop. Crop the image to fit the desired dimensions and determine where the blur will occur.
-

Draw a Dividing Line
Select the line tool. In the options bar at the top, change the fill and stroke colors to white, the stroke to 0 px and the weight to 5 px. Draw a line where you’d like the blurring effect to occur (Hold shift while drawing to ensure the line is perfectly horizontal or vertical).
-
Duplicate Image & Blur
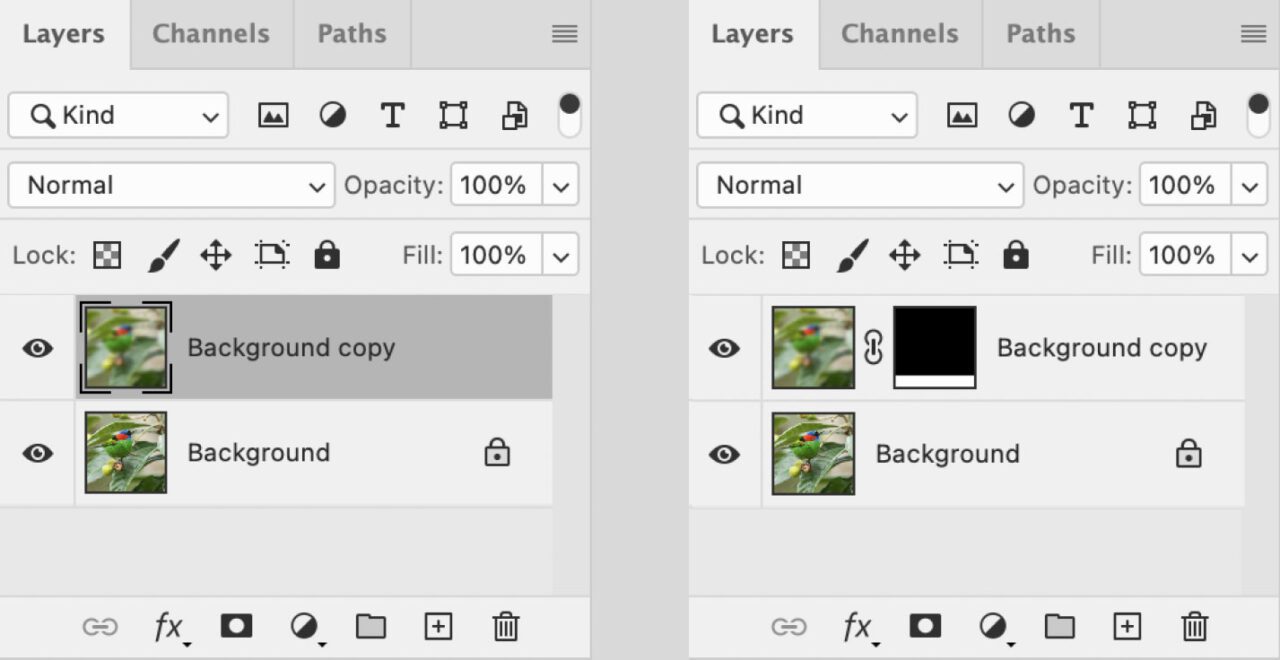
Duplicate the image layer. The new image layer should be above the original with the line from the previous step on the top. With the new image layer selected, add a blur to the layer (Filter > Blur > Gaussian Blur). Set the Radius to 30 Pixels, press “OK.”
-
Select Blurred Area
Select the Marquee tool in the toolbar. Click and drag to select the section you’d like to blur in the final image (on either side of the line you drew). This selection should now be framed with a rotating dotted outline.
-
Add a Layer Mask
With the area selected, click on the top layer that’s blurred and click the “Add layer mask” button at the bottom of the layers window. This means that layer is masked (the white section in that mask is where the blurring effect is visible and the black section of the mask is hidden). This can be edited using the marquee tool and black and white color fills.
-
Add Texture Overlay
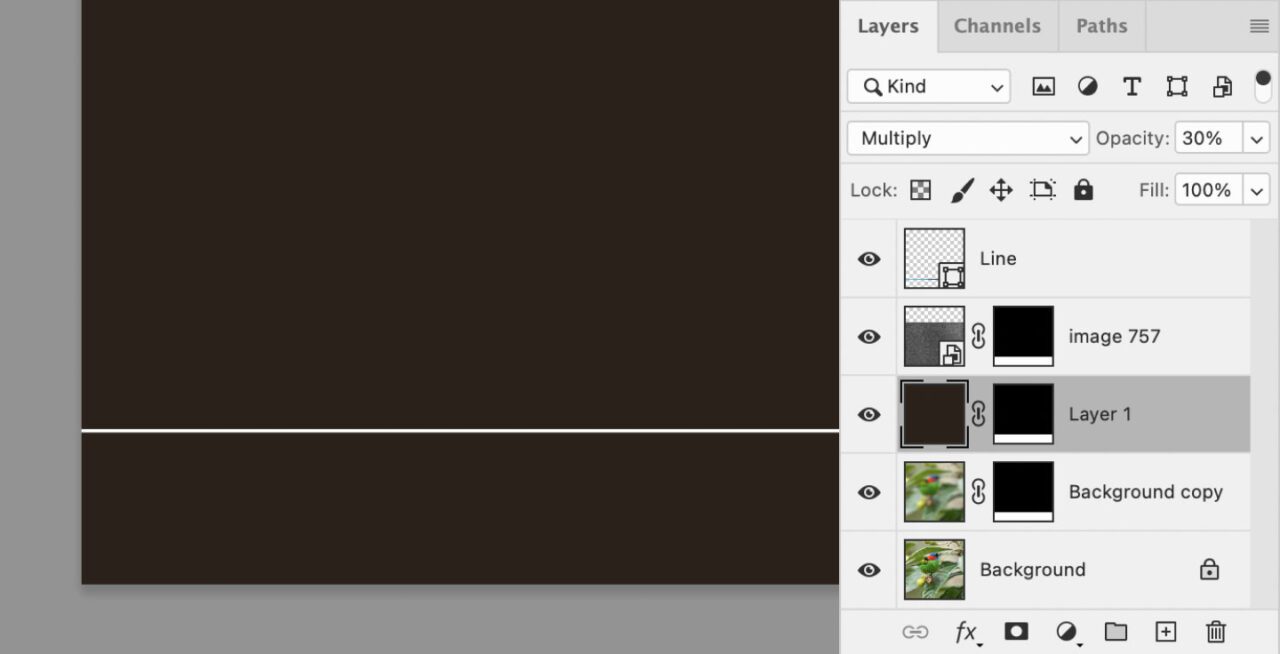
Insert the Lab’s “texture.png” into the file in a new layer. Resize the texture image if needed so it covers the blurred section. At the top of the Layers window, set the layer blending mode to Overlay and the Opacity to 20%. Select the same section from the layer mask of the blurred layer and add a layer mask to this layer.
-
Add Black Overlay
Add another layer and fill it with warm black (#2E261F). Set the layer blending mode to Multiply and the Opacity to 30%. Select the same section from the layer mask of the blurred layer and add a layer mask. This will darken the blurred section so the type will have maximum contrast and legibility. Opacity can be increased if needed.
-
Add a Logo and/or Type
Select the type tool to add headline text or the species, photographer, and ML#. You can also drop in logos if needed. The type and logo layers should reside above all the other layers below. Save as a PSD to create a template you can edit and use for other posts. Flatten layers and save as a PNG to share on social platforms.


-
Final Photoshop layers
-
Resulting image

